
There are few tools for your 4×4 that are as tough, versatile, and inexpensive as the ubiquitous Hi-Lift jack. The basic design by Bloomfield Manufacturing dates back over 100 years. Cast steel construction and a 7,000-lb. capacity means that the Hi-Lift you buy could last you the next 100 years. They can lift your vehicle, clamp together broken parts, spread bent cage tubes, and even winch you out of situations that would otherwise leave you stranded. Hi-Lift jacks can also be dangerous with the potential to cause smashed fingers, missing teeth, and concussions. That doesn’t mean that you need to be afraid of these tools. You just need to have a healthy respect for them and learn how to use them properly. The trick is to learn the easy way and not the hard way.
Are you scared yet? Good, we have your attention. When used correctly, the Hi-Lift jack is an irreplaceable piece of equipment for any vehicle in any terrain. These jacks lift the chassis up, which can be useful when you are bellied out on a rock or tree stump. If you want to lift a tire off the ground the entire suspension will droop out before the tire lifts, so we recommend strapping the axle to the chassis at ride height so the suspension cannot extend. This is not only useful when changing a tire, but also when placing sand ladders or filling a hole under a tire. We have even pushed the vehicle off a Hi-Lift to move it out of ruts and put a Hi-Lift across a rut as a bridging platform and driven over it. Sketchy? Not if you understand how the jack works and how it will react to different forces.
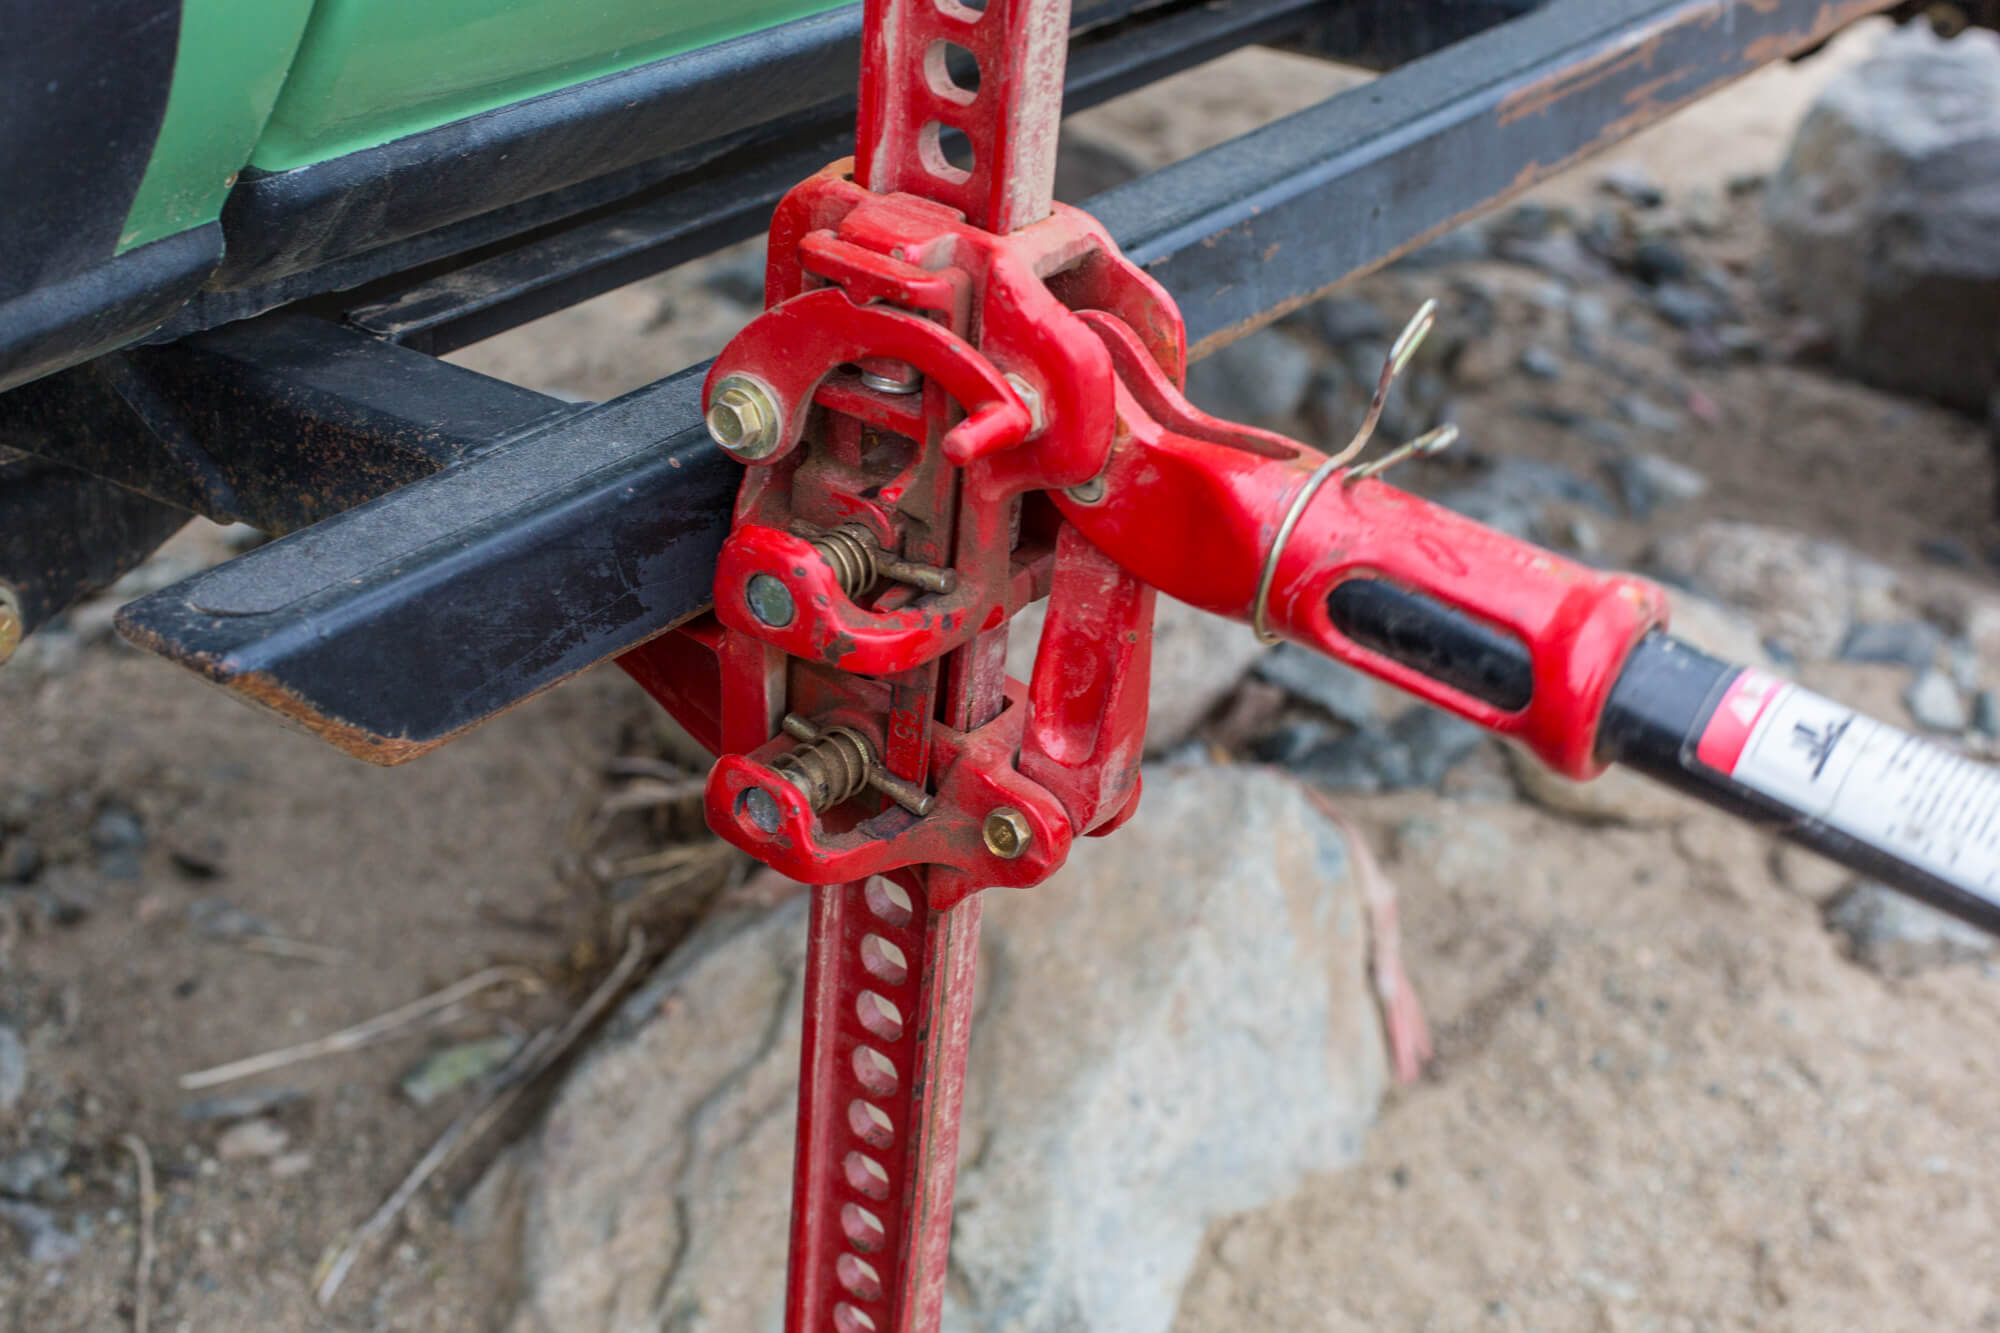
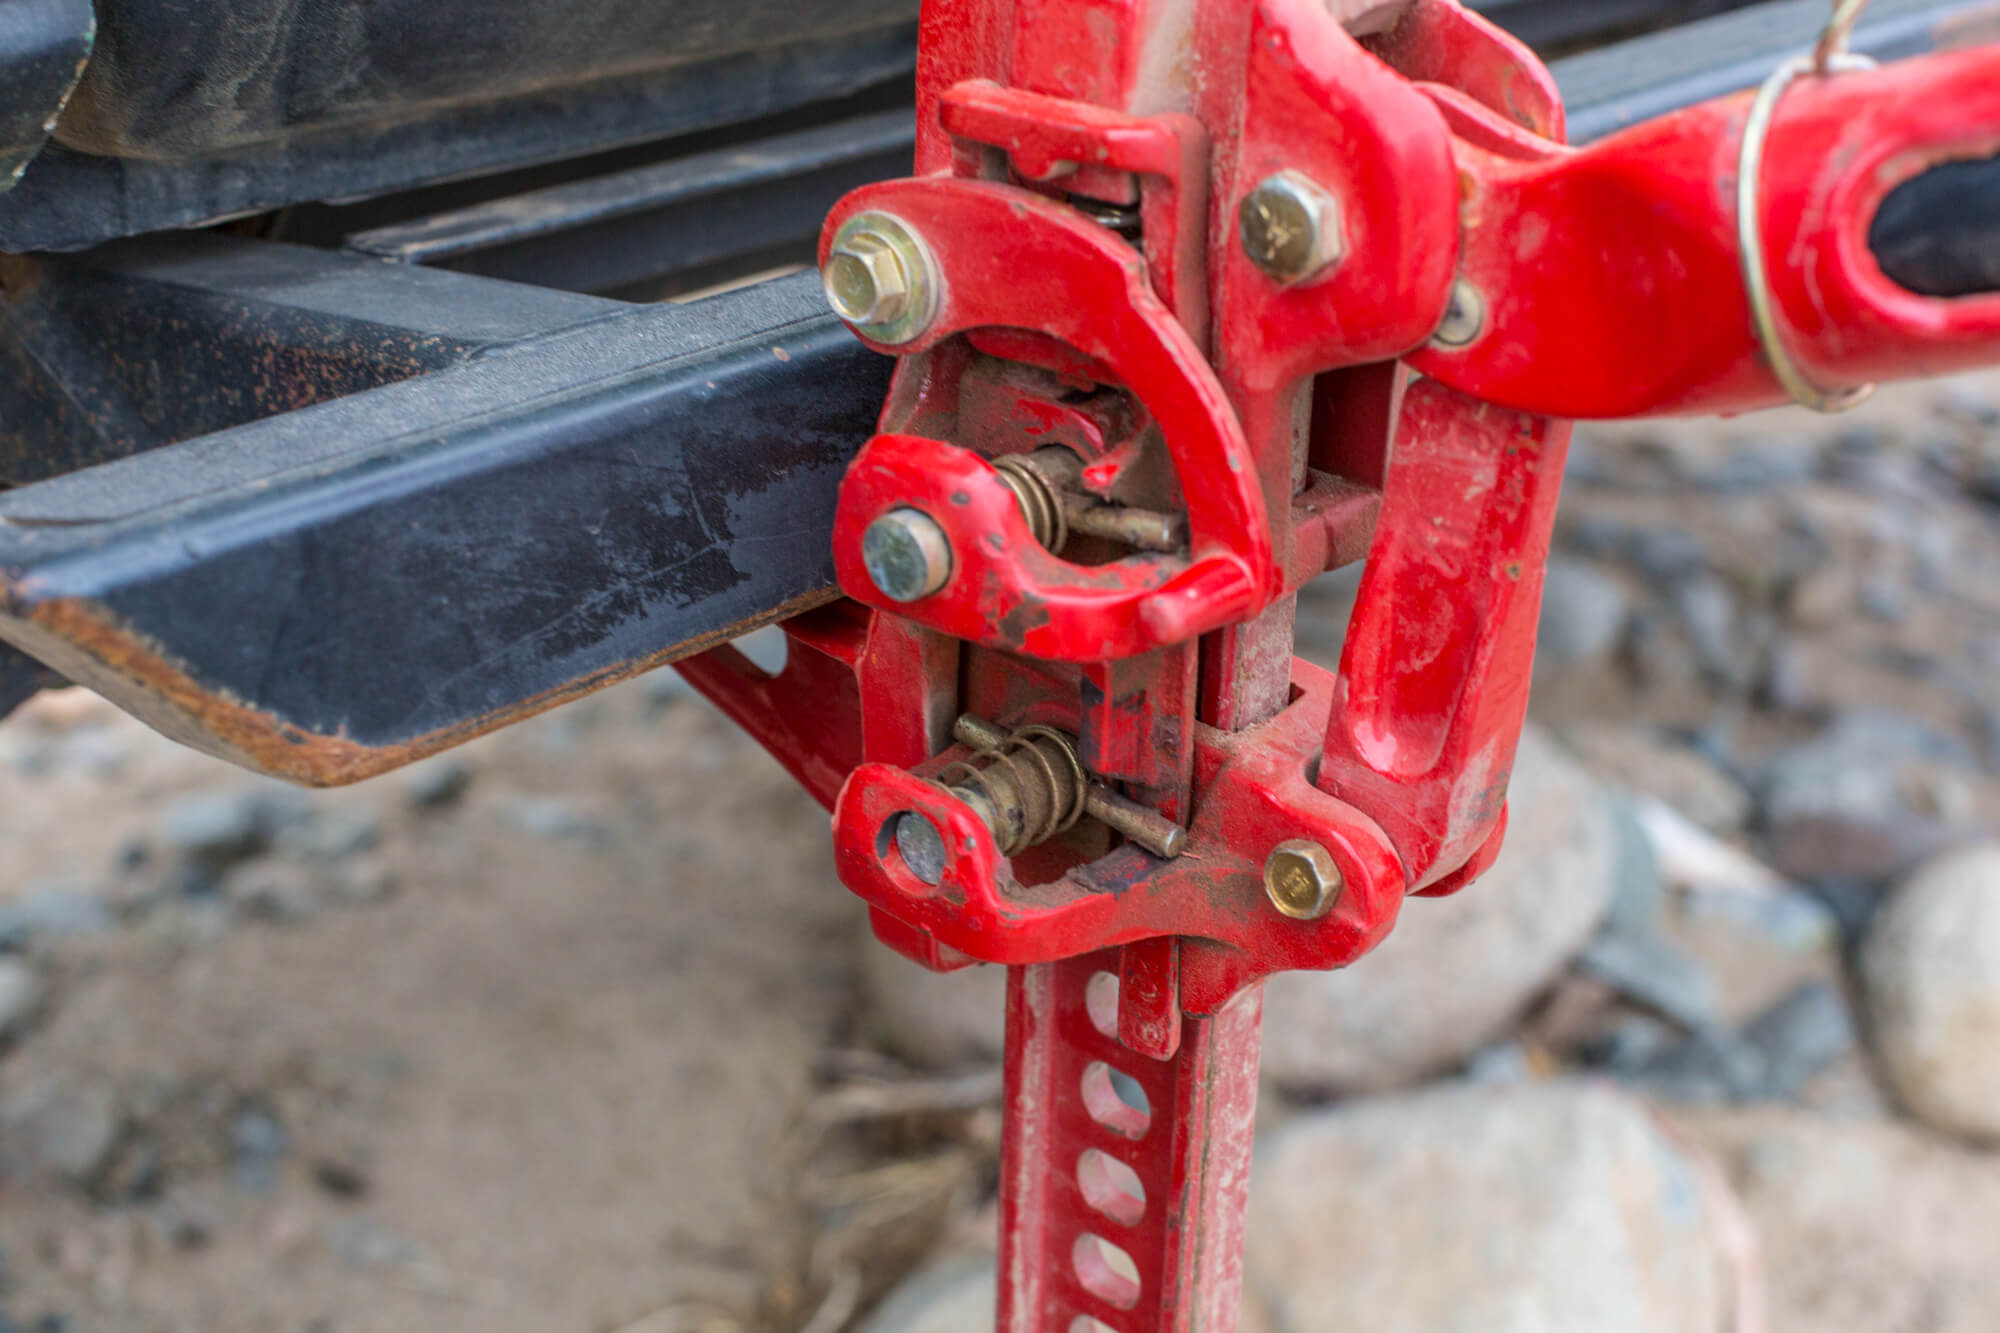
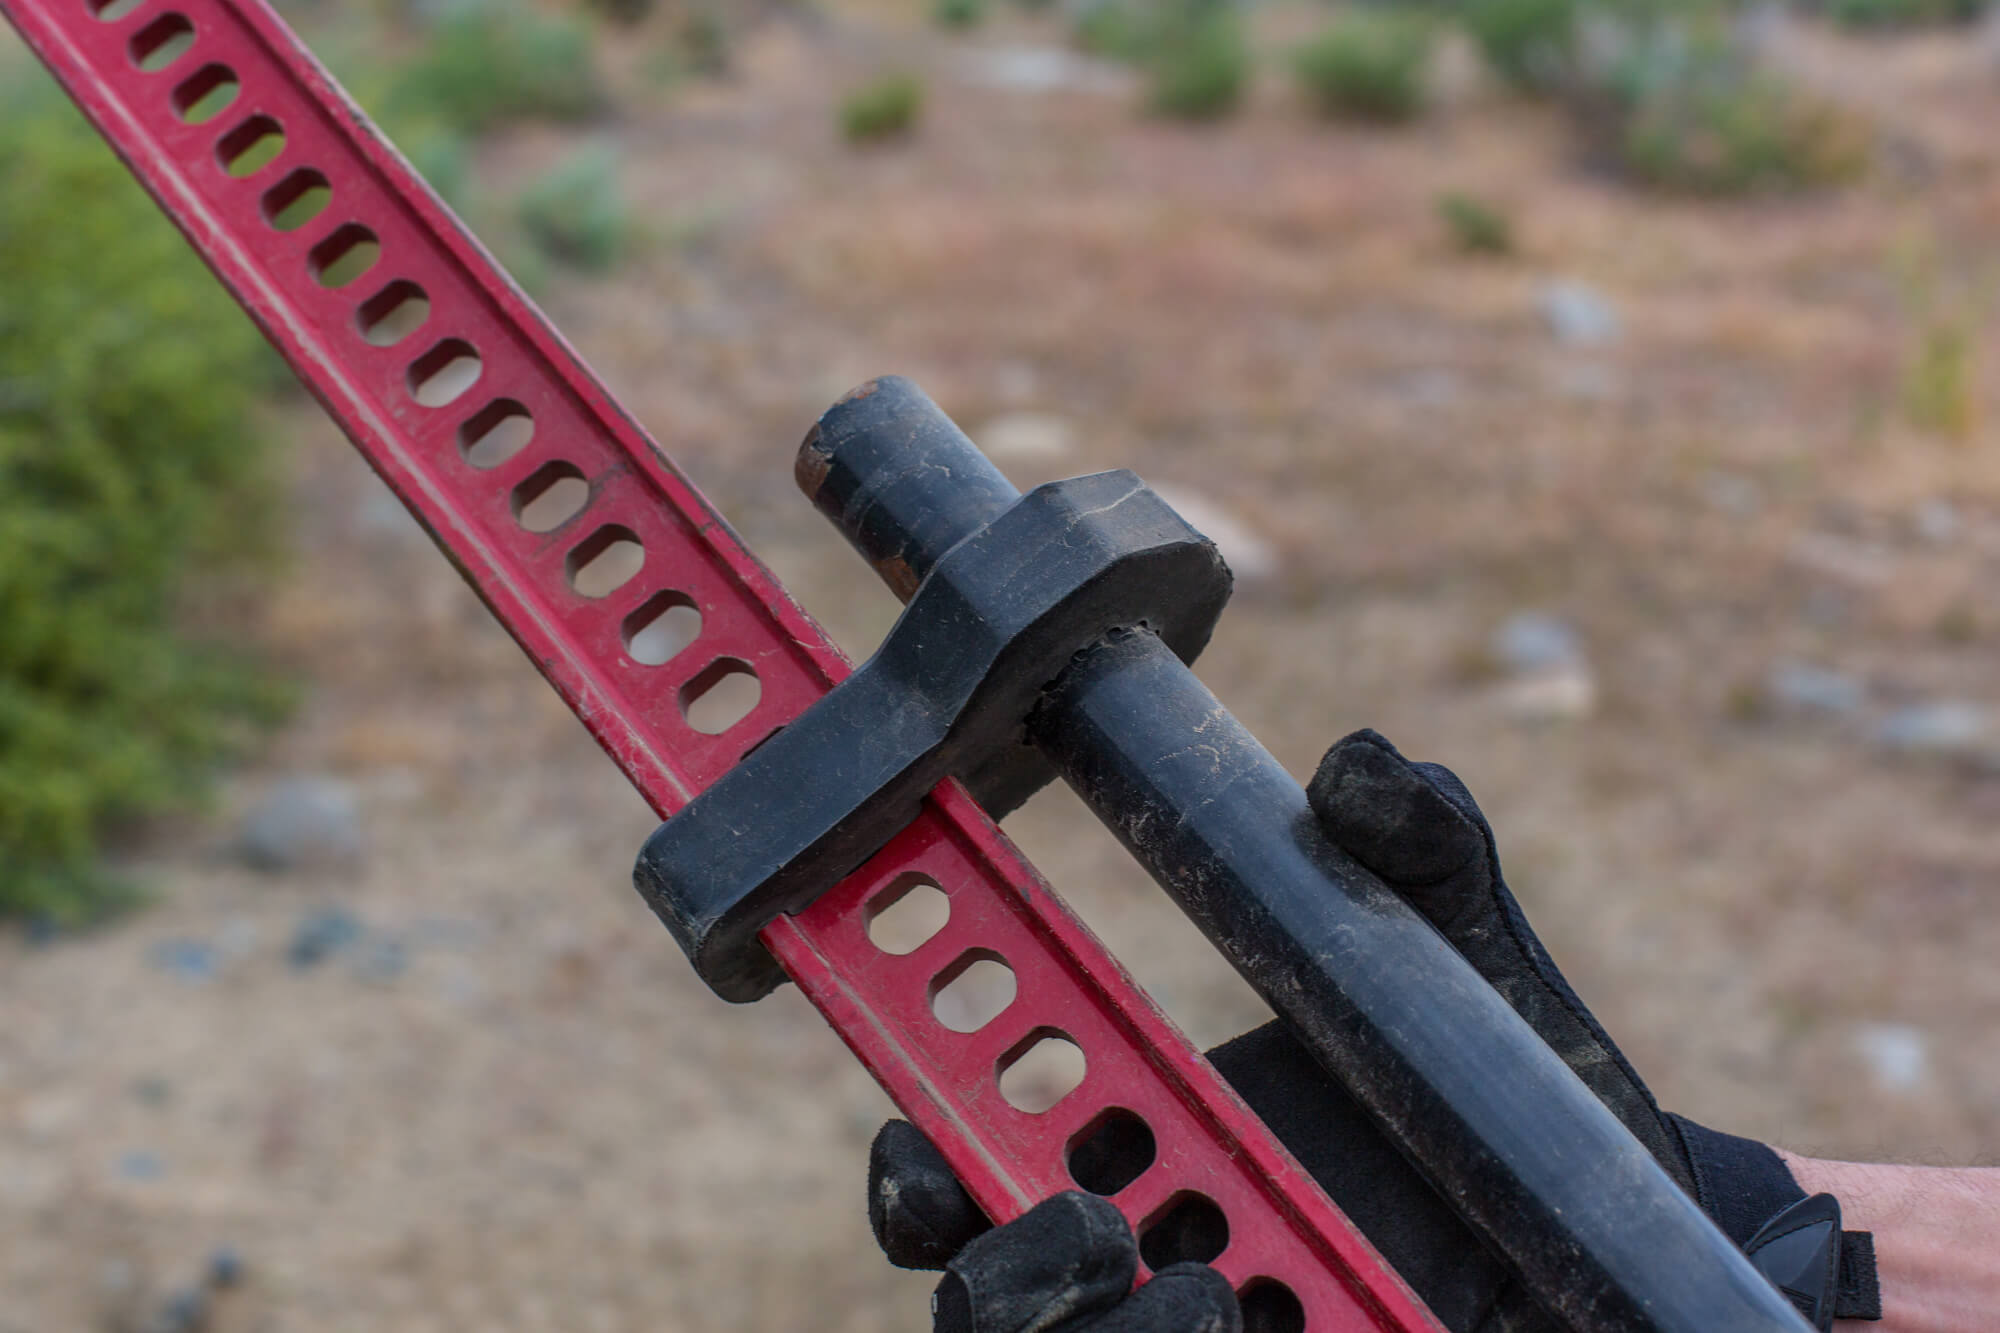
As you pull down on the handle of a Hi-Lift jack, the bottom pin is held in position and the top pin moves up the bar. As you raise the handle the bottom pin climbs to the next hole. Note that above the pins in the lever are locked in the up position. A Hi-Lift is simplistic in operation and, when maintained properly, can last a lifetime.
Whether jacking or winching, remember to keep your arms extended with your head away from the handle. Other safety tips include wearing gloves and chocking the wheels before lifting your vehicle. If the handle comes flying up, it will crush anything in its path, including your teeth, fingers, and jaw. The energy stored in the jack is enormous and must be respected.
How A Hi-Lift Works
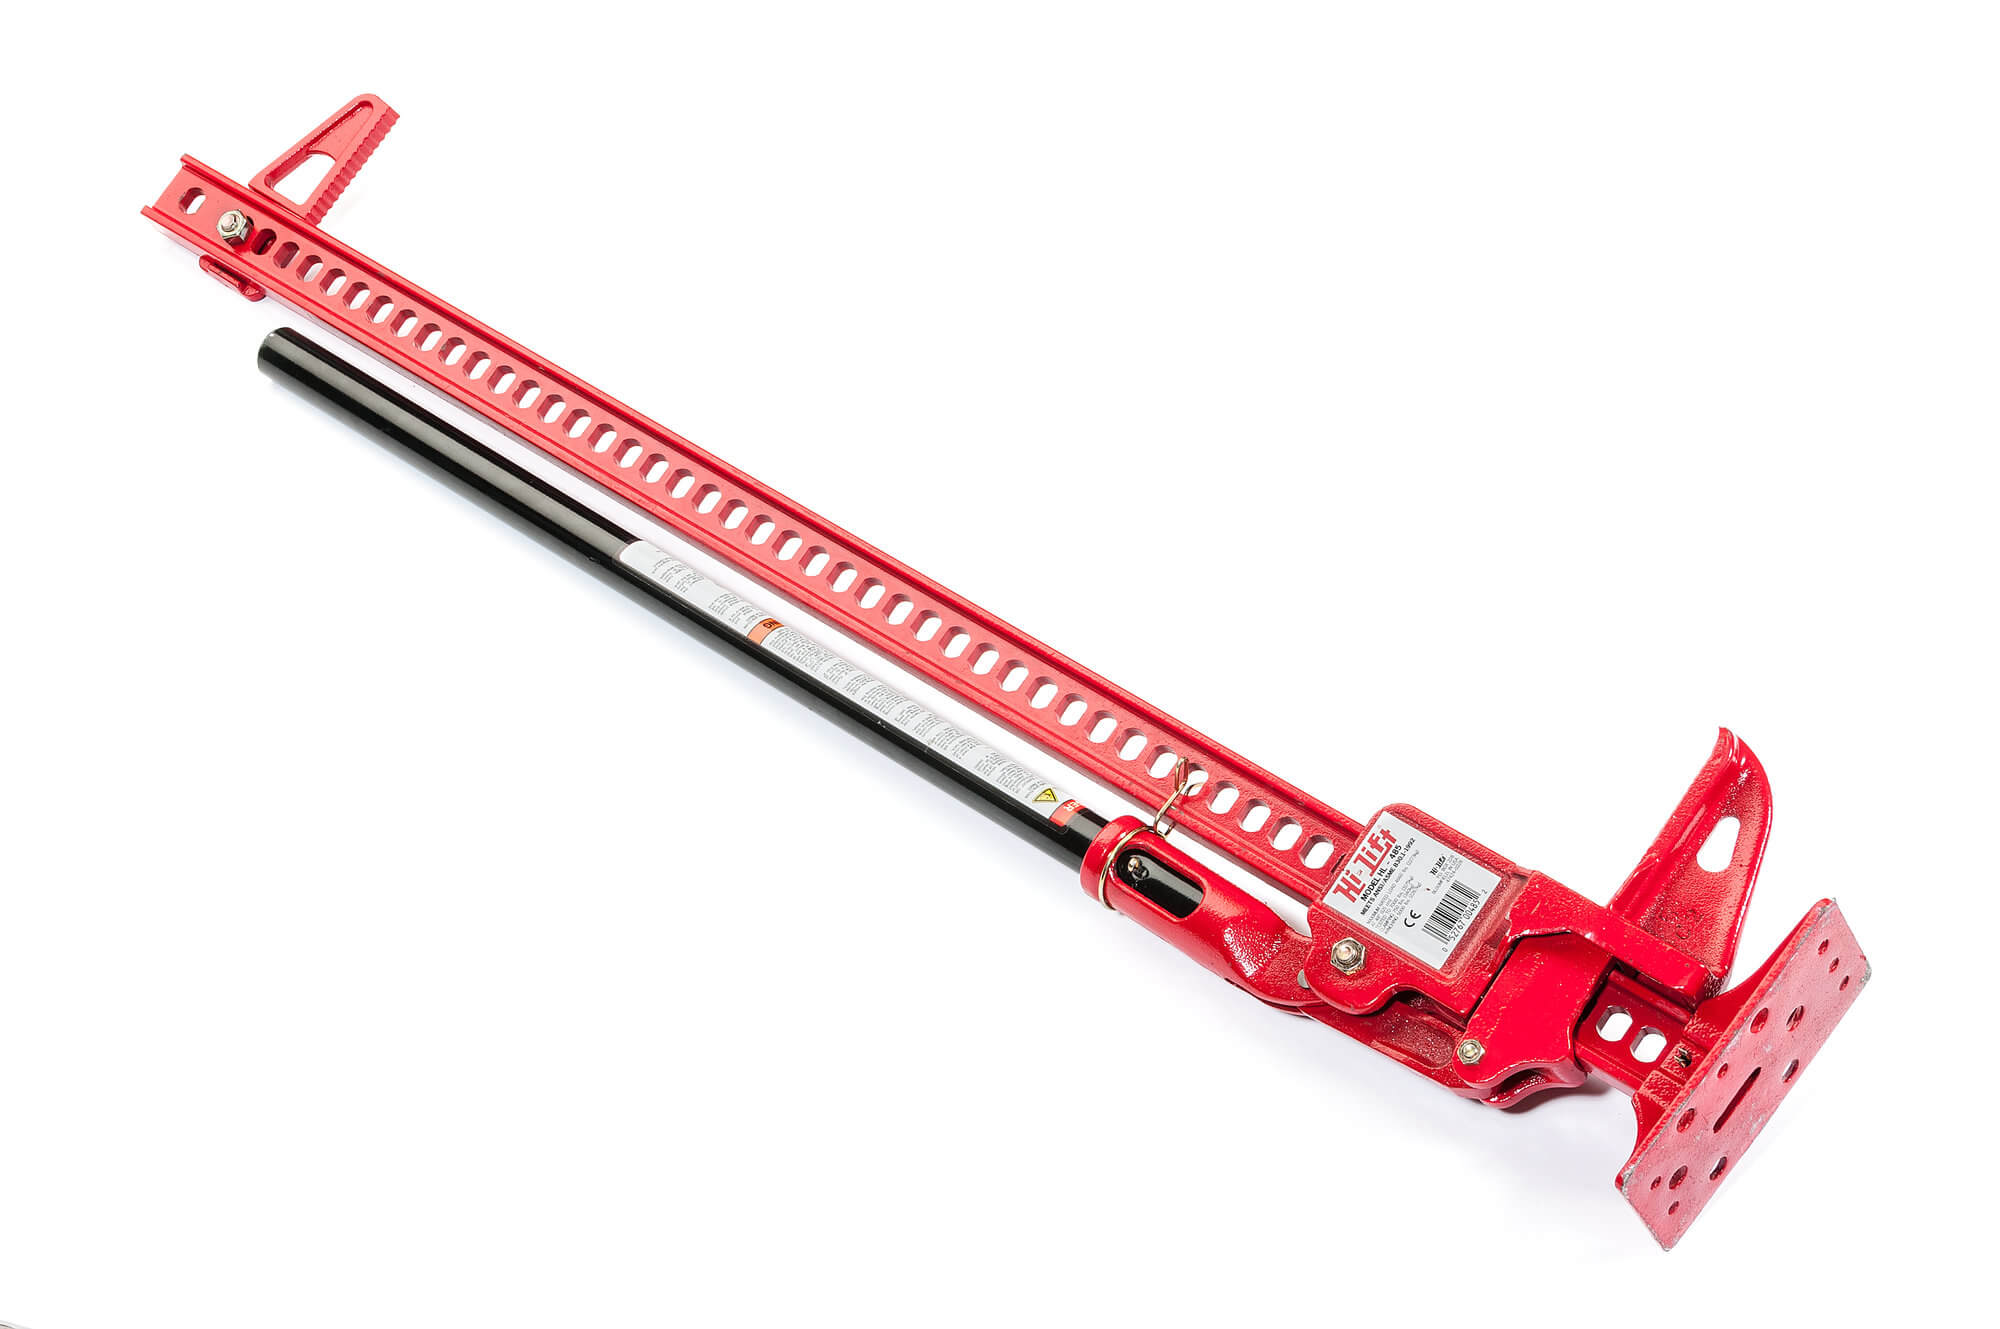
Two climbing pins on the Hi-Lift’s runner alternate up the bar’s series of holes. One pin holds the load as the other is freed and moved to the next hole above when raising or below when lowering your rig. The standard Hi-Lift is 48 inches long, but a 60-inch Hi-Lift is also available for taller vehicles. The vehicle is lifted by the leverage of the handle and the weight of the operator. If you overload the jack’s 7,000-lb. capacity, a shear pin in the mechanism gives way before any critical part of the jack breaks and freezes the jack in place rather then suddenly dropping to the ground. Simple, right?

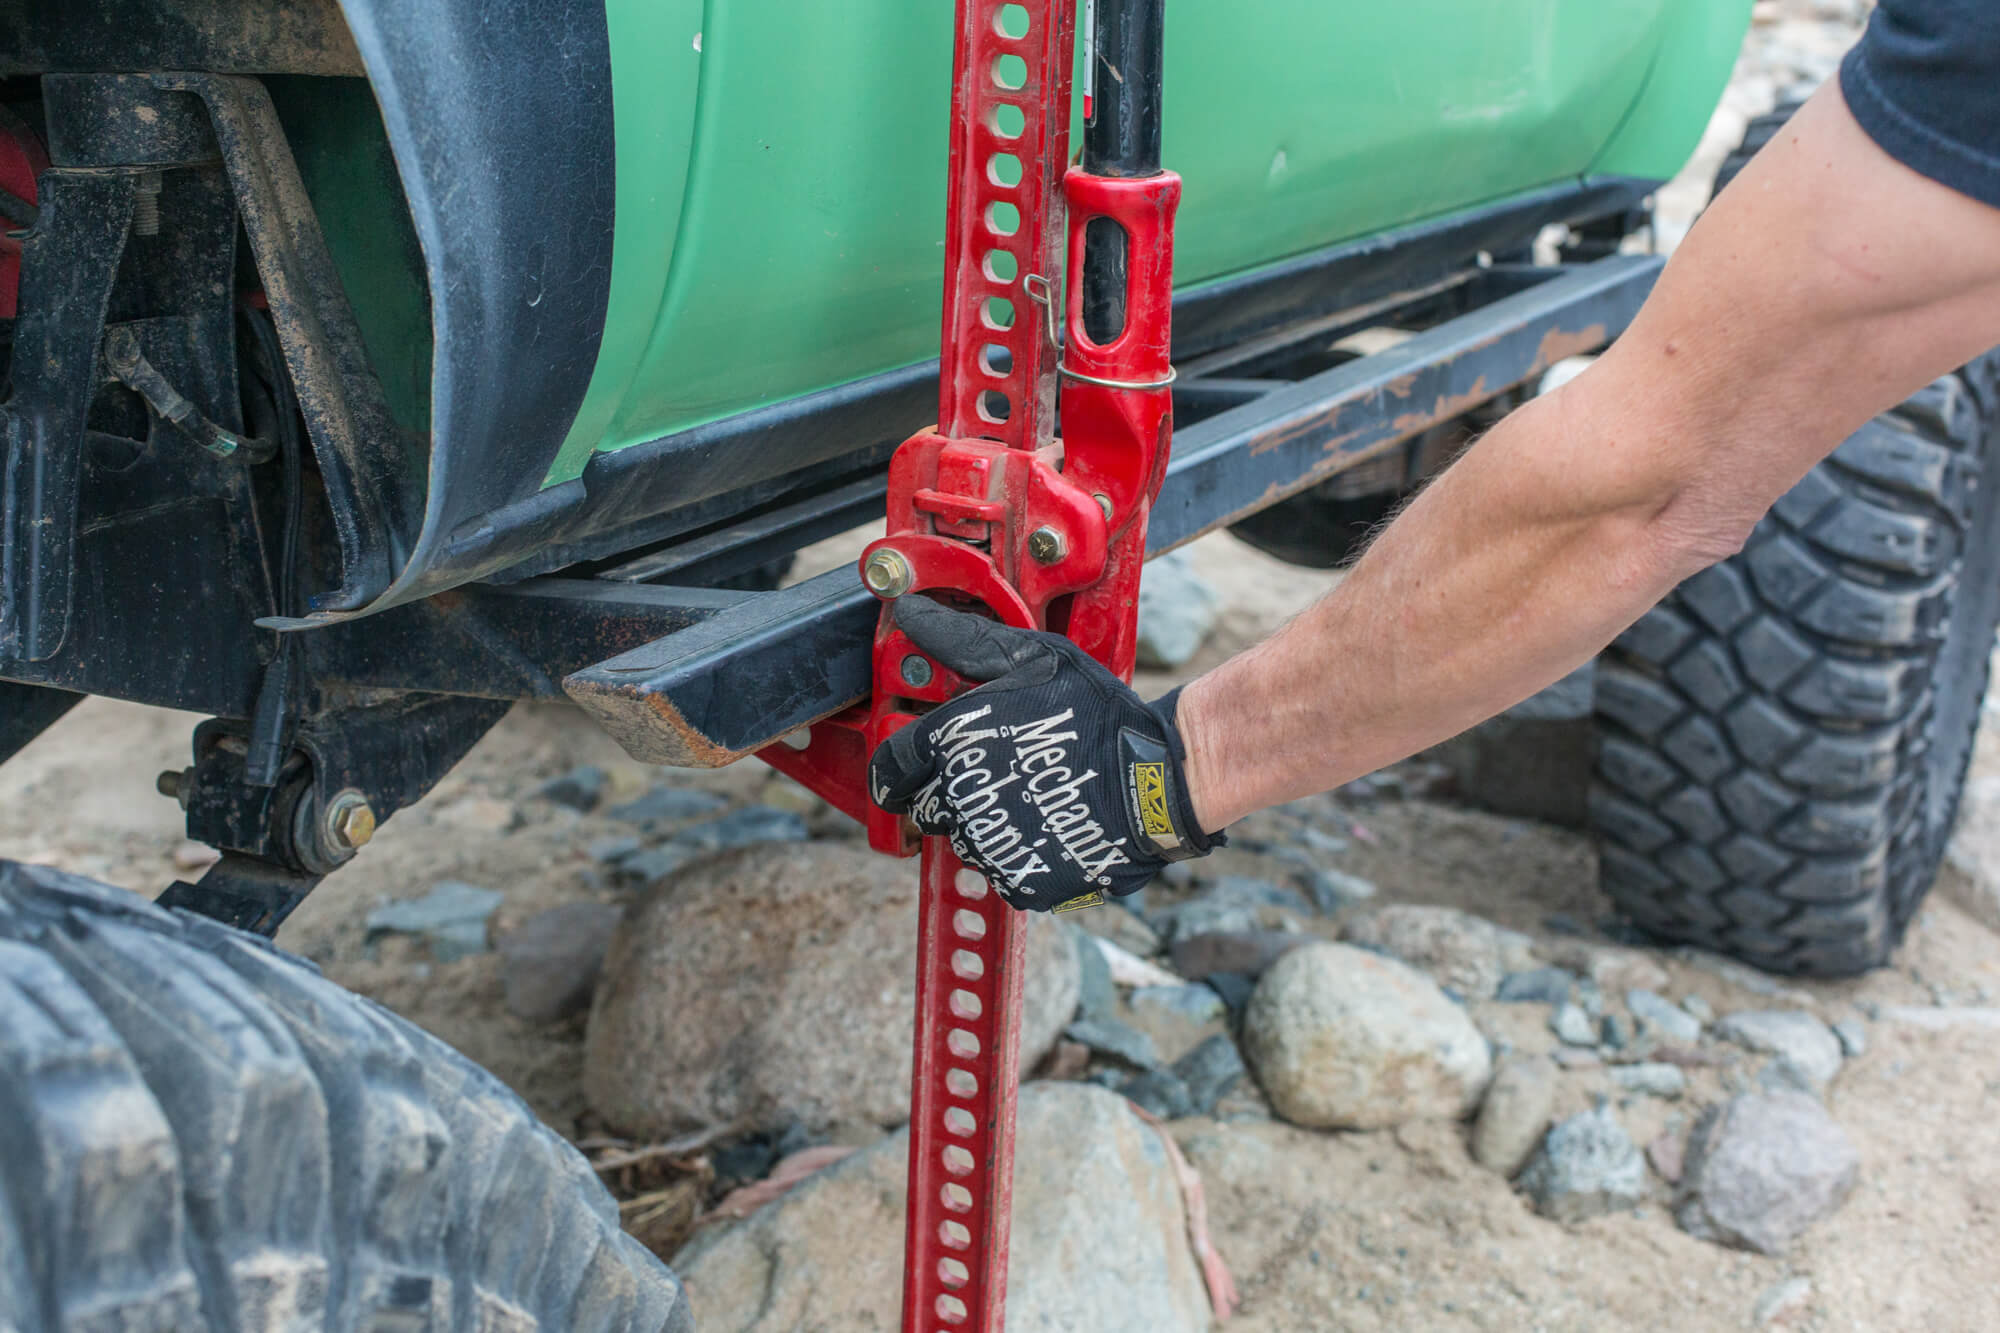
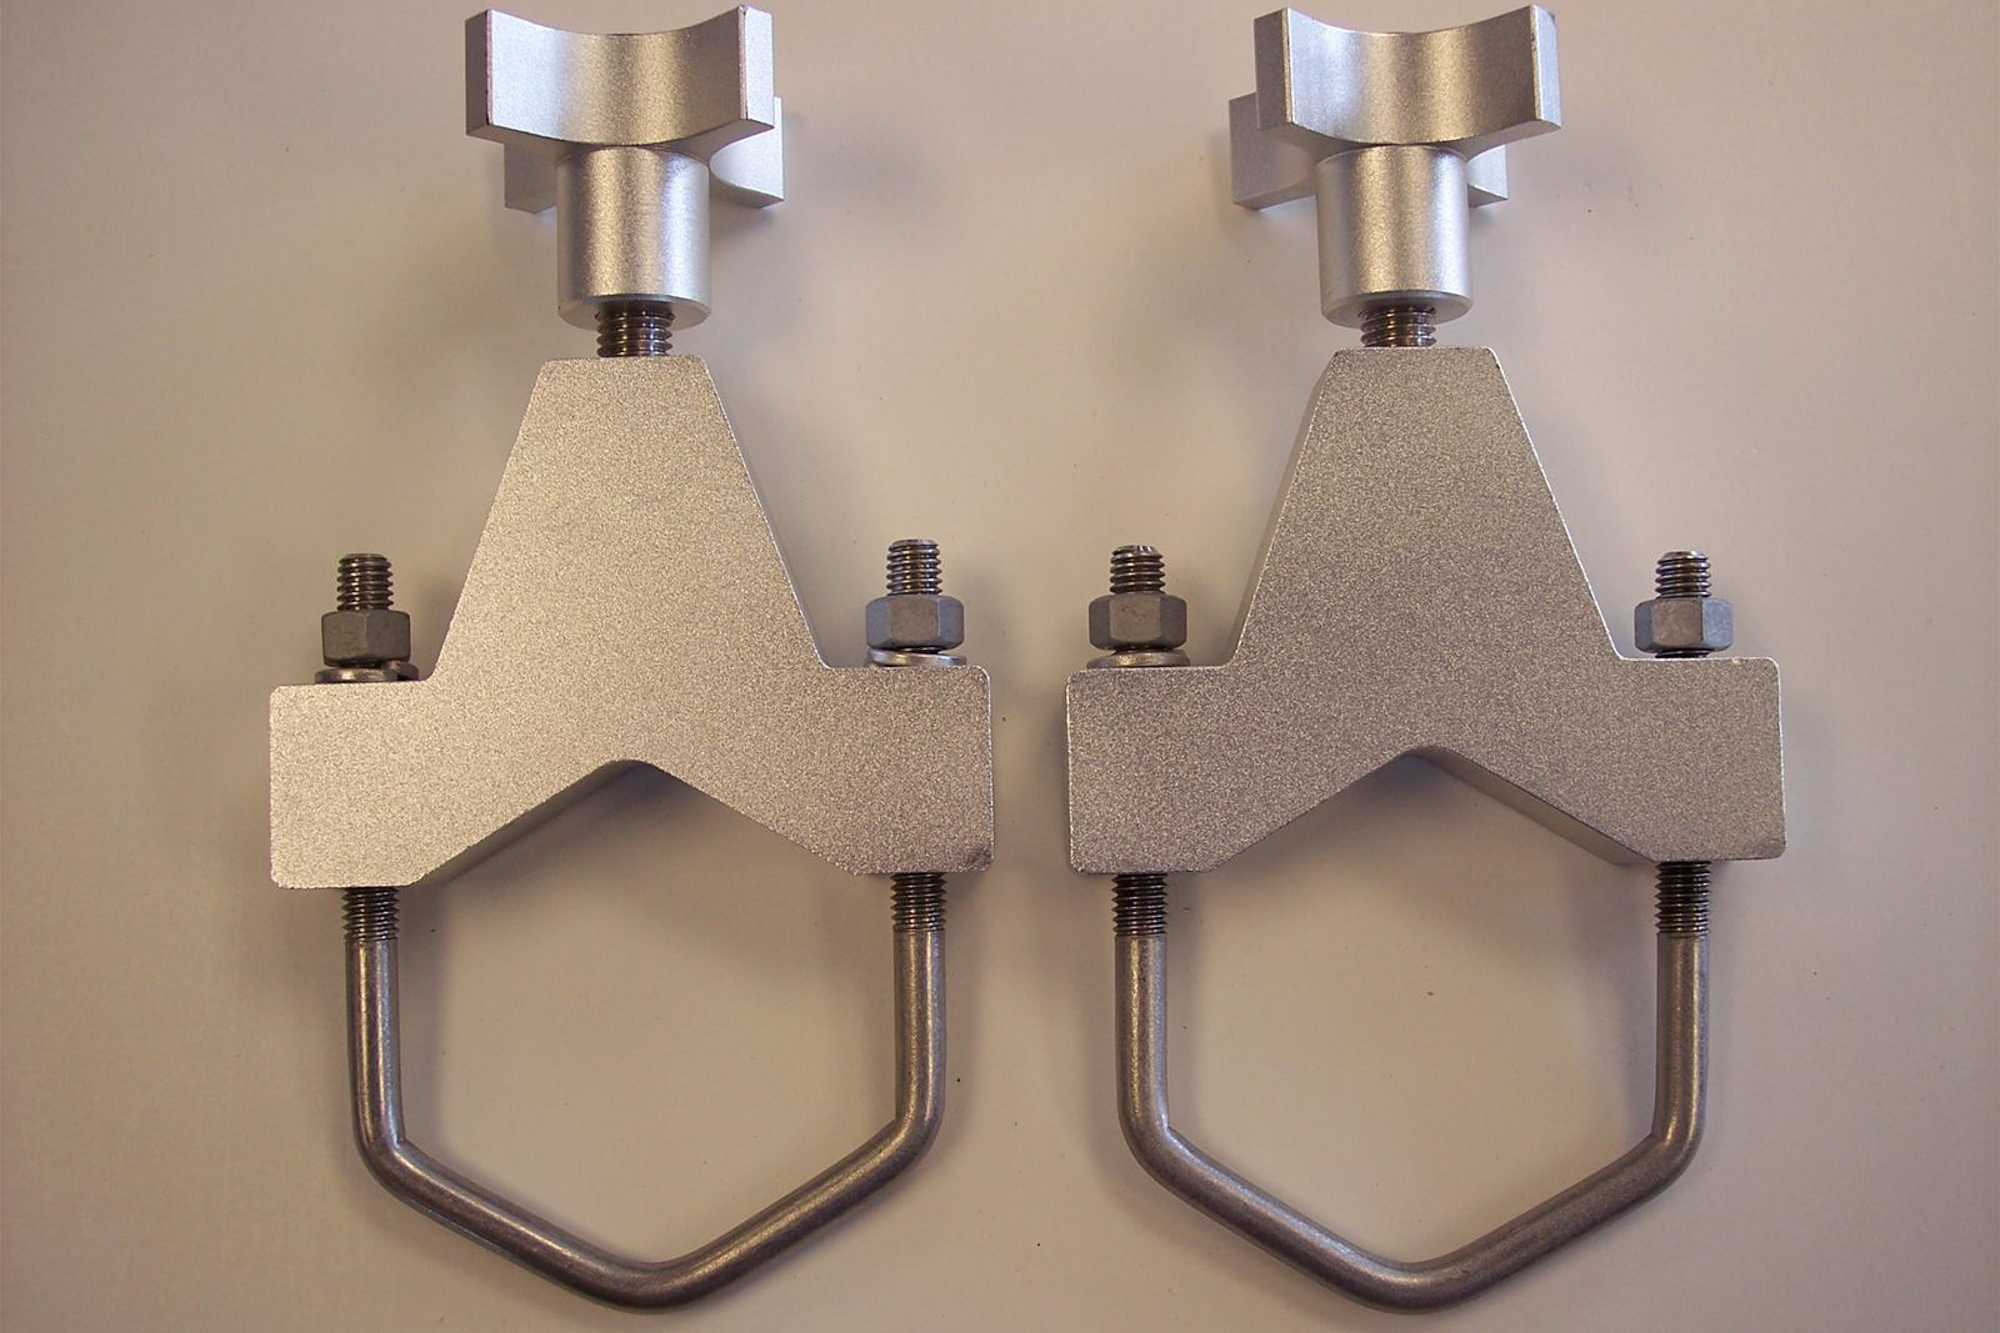
The foot of the Hi-Lift fits cleanly under our box-tube rock sliders. If you have round sliders and bumpers, there are attachments offered that bolt on to the foot of the jack to capture the round tubing instead of only having one point of contact. One of the most common mishaps is when the jack slides of the surface it is mounted on.
When you’re ready to lower the vehicle, hold the jack with one hand holding the bar and handle together in the upright position. If there is a load on the lever you might need to give it a smack or even kick it with your heel to get the lever to change position. One of the best things about a Hi-Lift is that they are virtually indestructible no matter how you treat them.
How To Use A Hi-Lift
Before you even get your Hi-Lift out, think about what you want to accomplish. Are you trying to lift just a corner or the entire belly? Is the ground even or uneven? Where will you position the jack on the vehicle? Thinking about these factors will help you safely accomplish the task at hand. Stabilize the vehicle and set the parking brake or chock the wheels before lifting it off the ground.
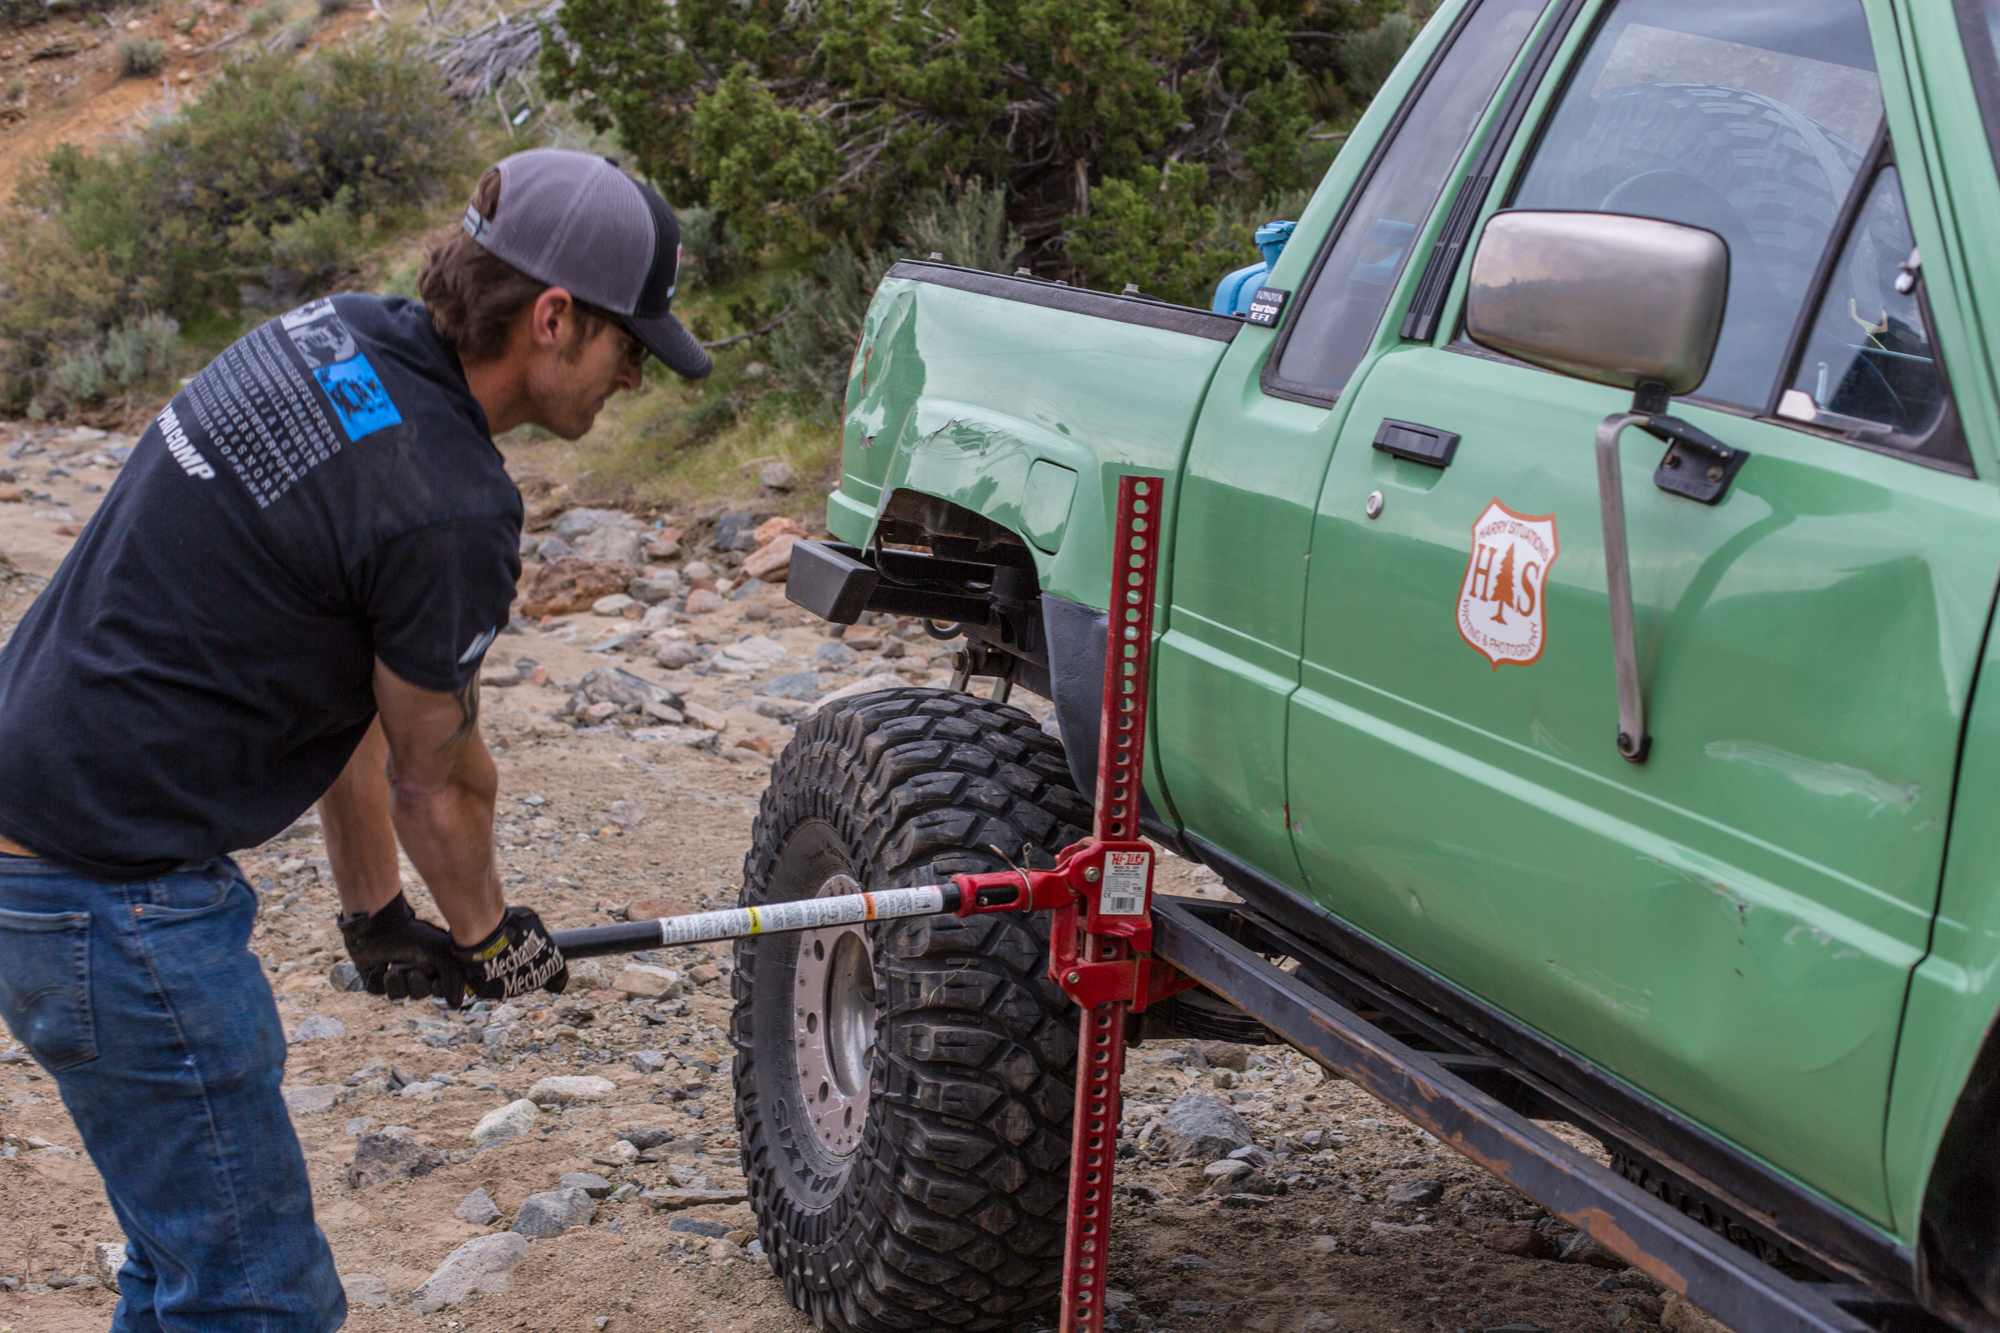
To lift your vehicle, the Hi-Lift must have the lever in the up position and start with the handle parallel with the bar. You can run the foot up the bar to where you will begin jacking without having to cycle the mechanism. This will only be possible if the jack is not under load and the lever is in the up position. Once the jack is in position grasp the top of the bar with your fingers squeezing only the three sides away from the bar. Do not wrap your thumb around the bar if at all possible. This may be difficult the more you lift the vehicle into the air, as the amount of effort required increases. If the jack tilts or seems unstable don’t force the issue, lower it and reposition for a safer lift. Practice makes perfect in this regard.
When you’re ready to lower the vehicle, hold the jack with one hand holding the bar and handle together. Strike the reverse lever into the down position, using your foot if the lever is stuck and stubborn. Keep one hand on the bar with your elbow locked and grab the handle with your free hand to lower it. After you hear the climbing pin click, you can raise the handle. As the handle arcs up the force will increase and the handle will be pulling your arm up to the bar. The leverage increases as the handle rises, so be conscious of your footing if the ground is slippery and keep your body clear of the handle.
When lowering a Hi-Lift the force will not come into action until you have lowered the handle to a horizontal position and pushed it a bit further until you see or hear the climbing pin click into place. After you hear the click raise the handle. Note that you want the mechanism to be free of rust for the components to move freely. If your Hi-Lift is subjected to the elements, you might need to lubricate it before use.
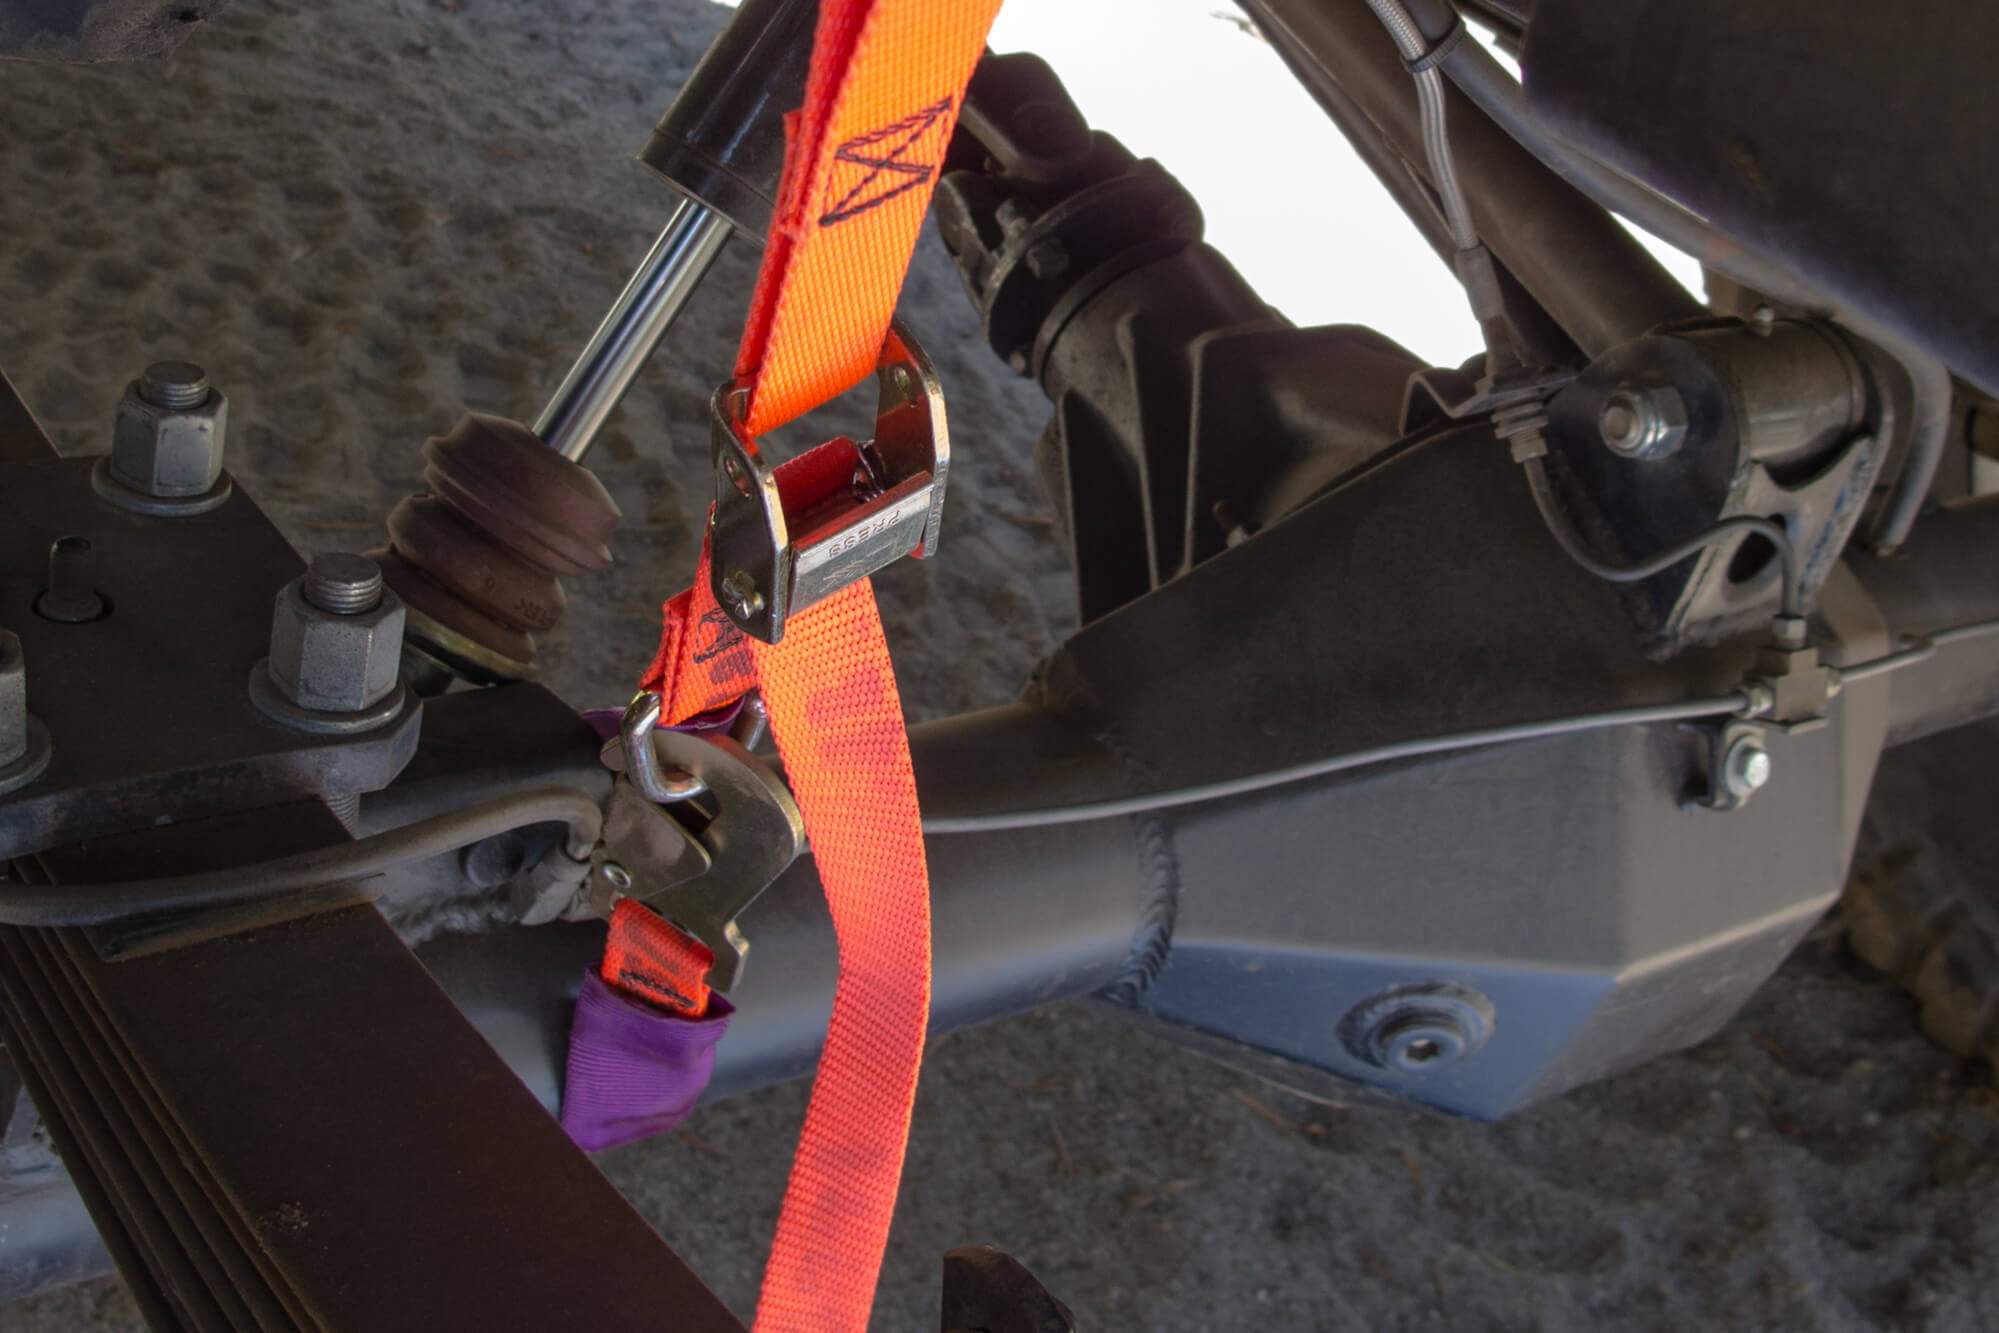
The Hi-Lift lifts from bumpers on the front and back of the chassis or rock sliders on the sides. It does raise the chassis as opposed to the axles like a floor jack or bottle hack. If you need to get a tire off the ground, strapping your suspension before lifting the vehicle will decrease how high you need to lift, increasing stability. Without a strap the tire might not even come off the ground on vehicles with lots of flex.
When A Hi-Lift Can Be Dangerous
Lowering a Hi-Lift is when there is the most potential for danger, but there is an enormous amount of potential energy any time the Hi-Lift has a load on it. The only time the jack is truly safe with a weight on it is when the handle is up and parallel to the bar and the lever is in the up position. When lowering a Hi-Lift the force will not transfer until you have lowered the handle past a horizontal position and the climbing pin disengages. Never let go of the handle or leave it in the down position. If your hand should slip off, clear away from the jack. During lifting and lowering, the weight of the load pushes up against the jack’s handle. If your hands slip off the handle, or if the handle is horizontal when you move the latch, it may move up very quickly. Normally the handle just hits the bar, but sometimes when you are trying to lower the jack, it will auto-ratchet down extremely fast, with the handle flying up and down. If you have not witnessed this before it is terrifying, and the jack handle will destroy anything in its path. If you are prepared though, even if your hand does slip off the jack and it auto-ratchets down, there will be no harm because your hands, face, and the rest of your body are clear of the danger zone.
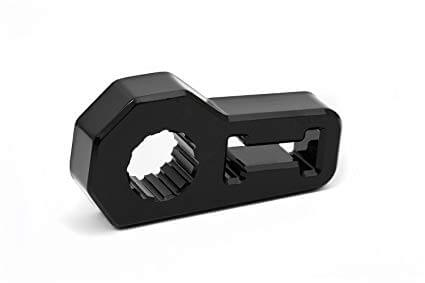
The handle of a Hi-Lift is just held in with a cotter pin. This is useful when you want to remove the handle to use it for a breaker bar or sleeve a bent tie rod. But the rest of the time it can rattle around and drive you nuts. Daystar, Hi-Lift, and others make handle isolators that are inexpensive and will keep the rattles at bay when your jack is stored.
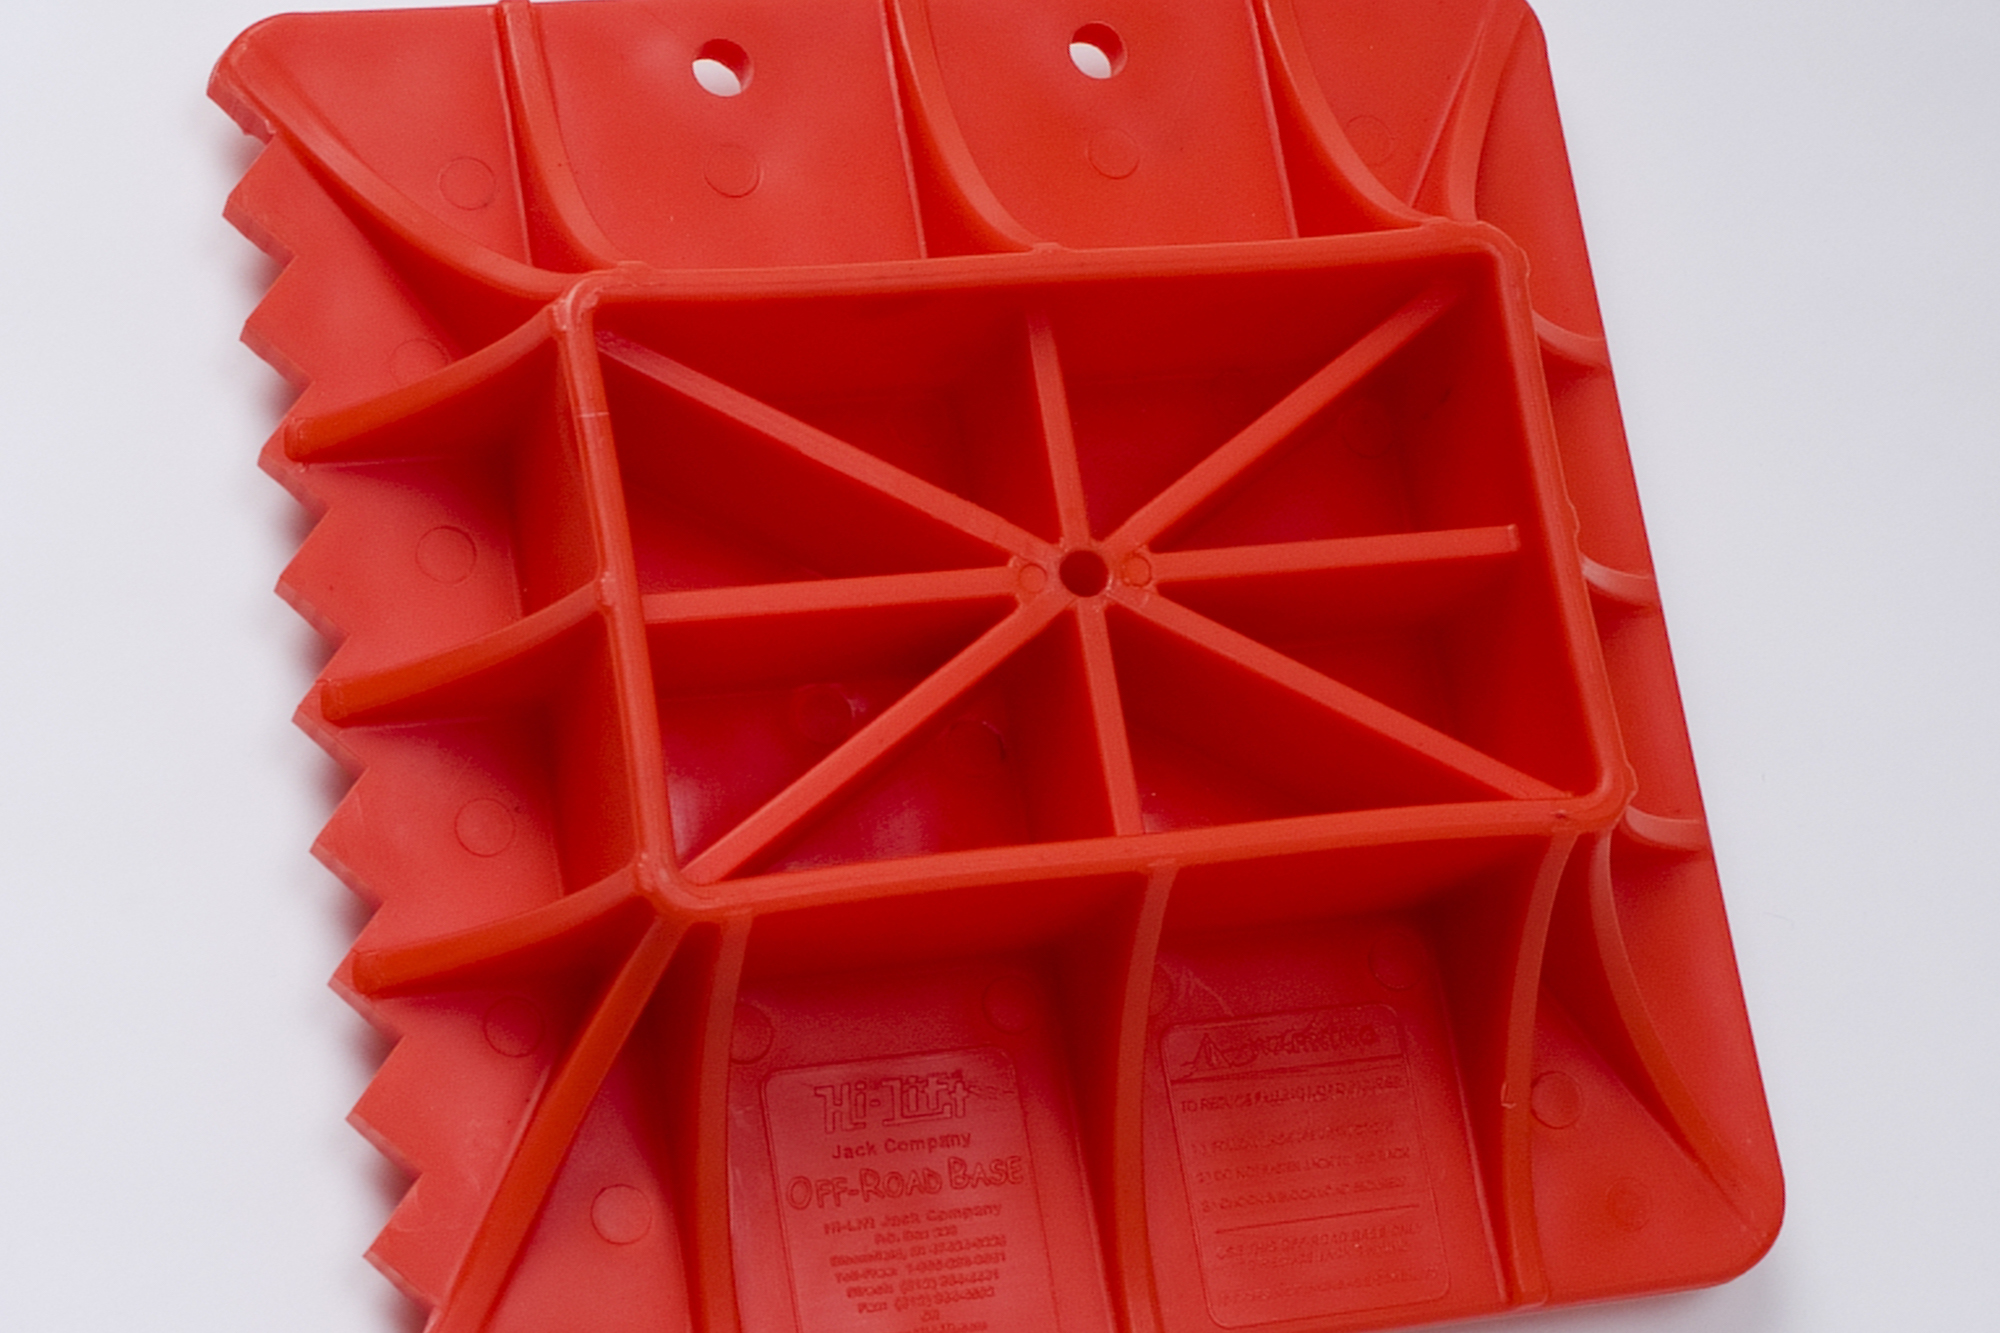
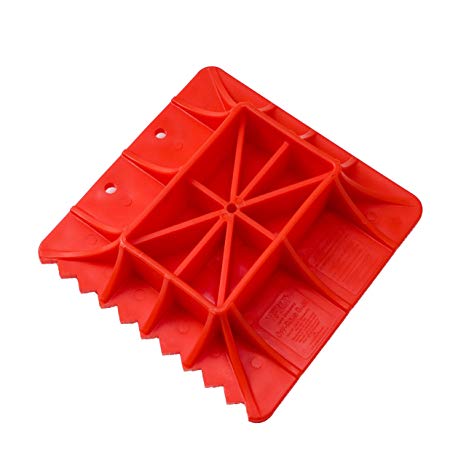
The standard base works fine on hard ground, but it can sink in soft sand, snow, or mud, particularly when lifting heavy vehicles. Hi-Lift offer’s a Jack Base that is inexpensive and durable. It even has a hole to accept a cord so you don’t lose it in the sand or mud. In a pinch, a flat rock, board, or even a floormat is better than nothing.
All The Accessories You Can Dream Of
As handy as the Hi-Lift jack is, there is an entire aftermarket industry devoted to making these jacks even more safe and useful on the trail. These include various attachments to the foot of the jack to securely capture round tubing, hook on a wheel, or mate to aftermarket bumpers. Other accessories are designed to go under the relatively small base that comes with the Hi-Lift. By increasing the surface area, the jack will be more stable and less likely to sink into soft terrain. Daystar, Energy Suspension, and Hi-Lift make handle isolators that keep rattles at bay, and Hi-Lift also offers neoprene covers to keep your jack’s moving components protected from the elements. This is critical to keep the jack from sticking and the climbing pins from gouging into the bar when you attempt to use your jack.
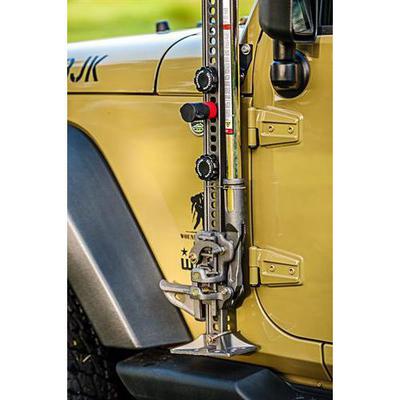
Another whole segment is dedicated to storing your jack. Being four-feet long and weighing over 30 lbs., a Hi-Lift is not the sort of thing that you just want to toss in the back seat before you hit the trail. Spare tire mounts and tube clamps for roll cages are the most common mounting systems. But Hi-Lift and Warrior Products make mounts for the hood of Jeeps, BOLT makes brackets that attach the Hi-Lift upright at the door hinges, and Garvin makes roof rack attachments. The best mounts hold the jack securely and protected from the elements, but are easy to access when you need them.
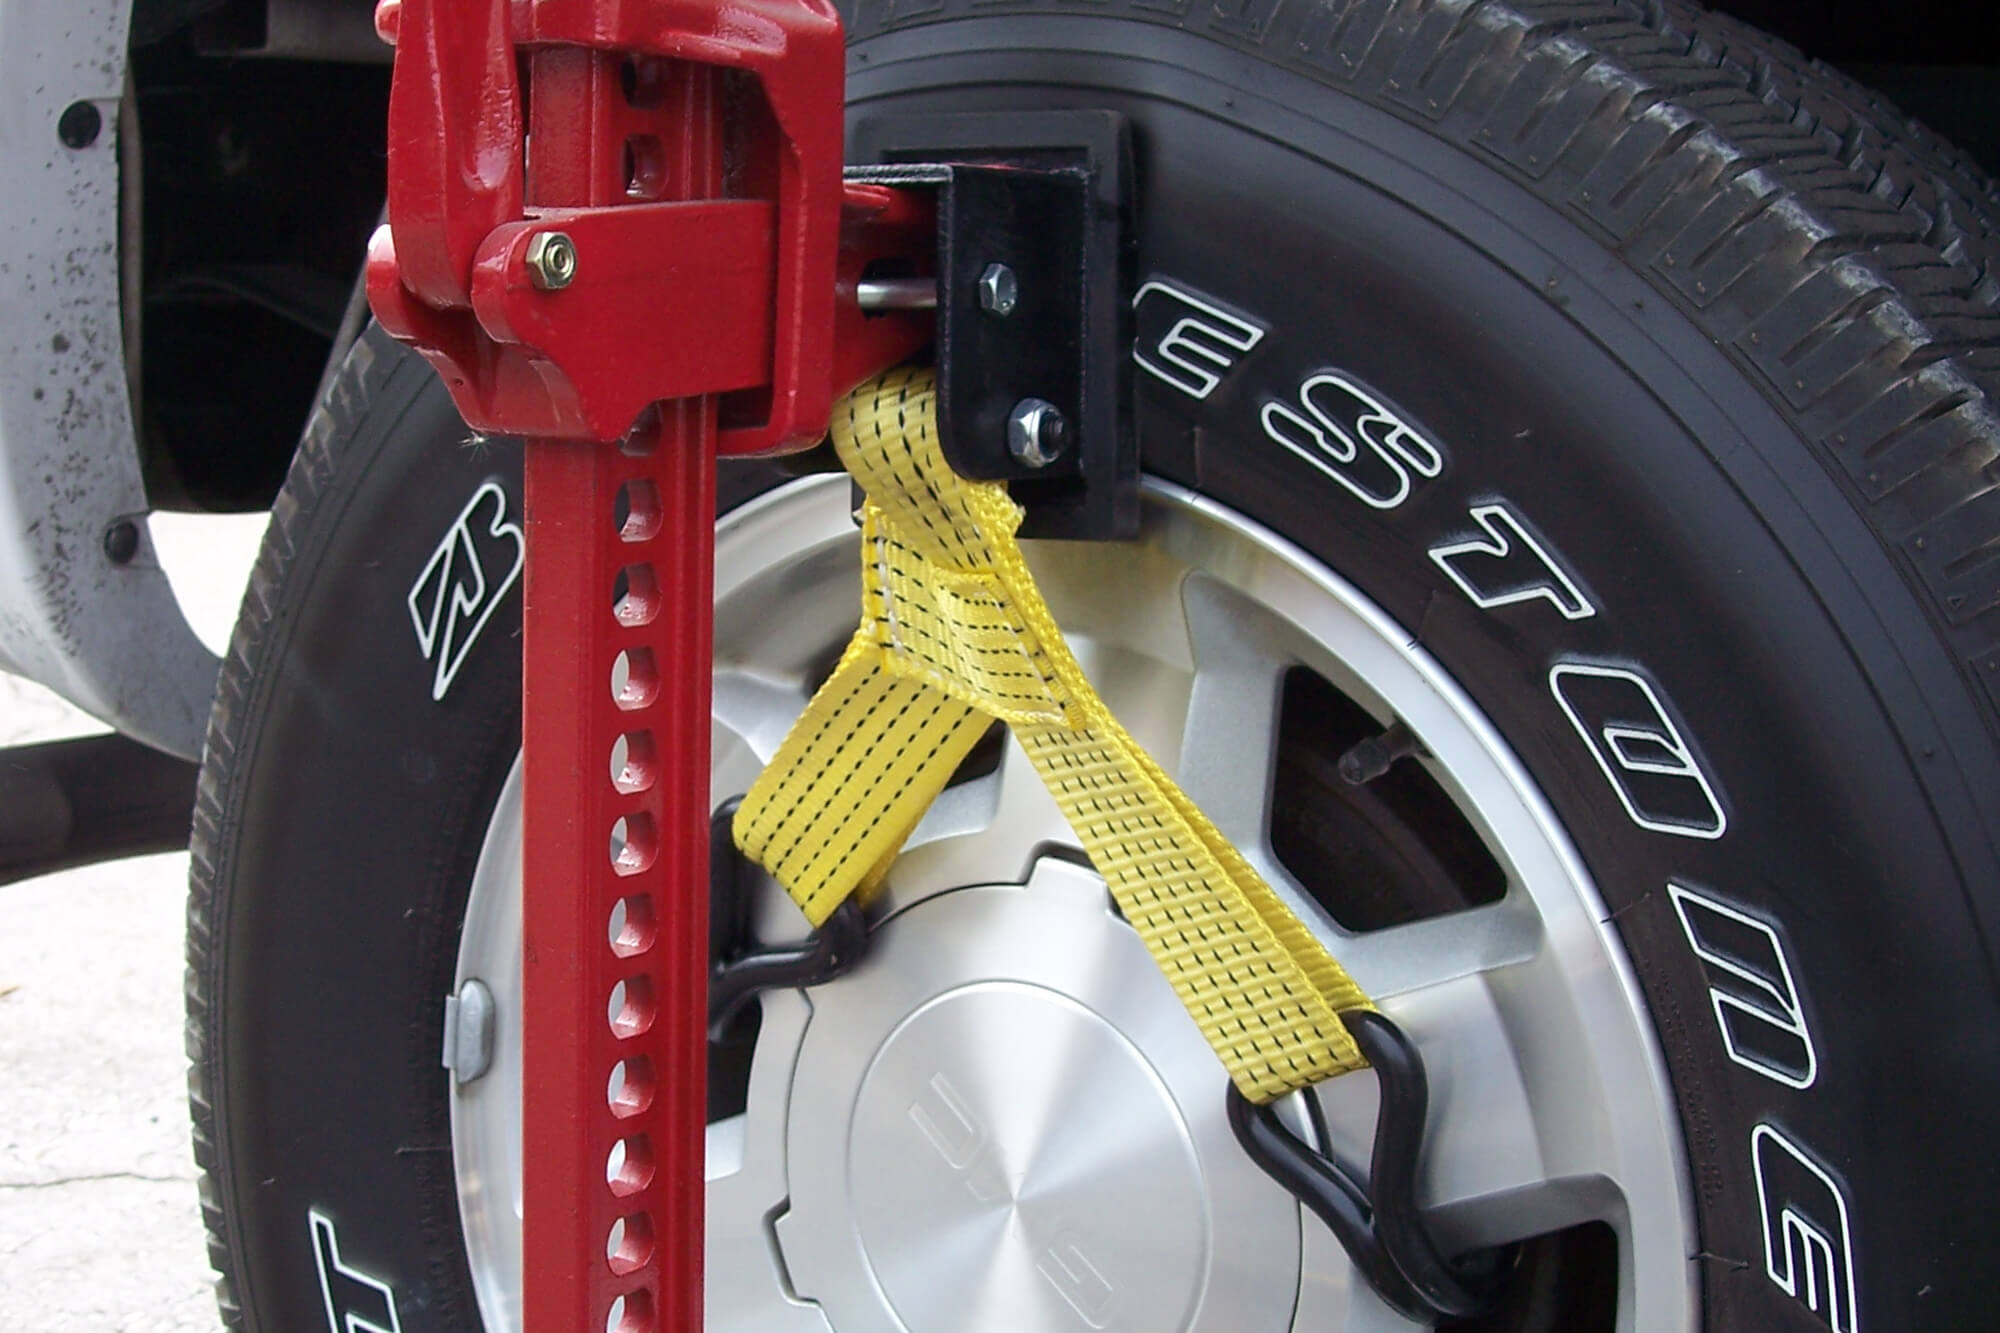
Not every rig has rock sliders or steel bumpers on it. The Hi-Lift Lift-Mate is designed to operate in a manner that allows the vehicle’s wheel to be lifted directly from the wheel. Even if you do have sliders, using the Lift-Mate greatly reduces the amount of travel up the jack bar needed to lift the wheel in the air. Obviously, you can’t remove the wheel when using the Lift-Mate.
Hi-Lifts are heavy, so you want to ensure that they are stored solidly on your vehicle when not in use. Options vary from hood mounts and roof racks to tire carrier mounts for Jeeps, where space is at a premium. The trick is to have the jack mounted so it is secure and doesn’t rattle around, yet still easy to retrieve when you need it.
The Final Word
After you learn how to safely use your Hi-Lift and have it easily accessible, you will be amazed by how often it comes in handy on the trail. A Hi-Lift might not be a replacement for a snatch strap or a winch, but it is a valuable piece of recovery equipment for a wide variety of situations in just as wide range of terrains. These jacks are not only useful for changing tires but also for clamping together broken parts, lifting a high centered vehicle, and dozens of other uses. Take care of your Hi-Lift and it will take care of you for years to come.
2